Linux环境下安装rclone配置google drive上传教程
1. 前言
我们在云服务器上,很多情况下会发现配置的硬盘根本就不够,想增加容量但是又需要加钱,有没有什么好一点的方案来增加我们的服务器容量,来为我们离线下载提供足够的空间。
如果我们可以后面再通过自动脚本,实现qB下载的文件自动上传,效果更好。
这一次我们先介绍如何在Linux上配置好rclone然后进行简单的上传。
2. 配置
2-1. 配置前的一些说明
rclone v1.59.1
之前配置 gd 的方法是会返回一个网页链接进行授权,只需要本地浏览器打开后,登陆,复制获取到的代码粘贴回车就行。
随着 rclone 更新到 v1.57 后,新版本提示:
Option config_token.
For this to work, you will need rclone available on a machine that has
a web browser available.
For more help and alternate methods see: https://rclone.org/remote_setup/
Execute the following on the machine with the web browser (same rclone
version recommended):
        rclone authorize "drive" "eyJzY29wZSI6ImRyaXZlIn0"
Then paste the result.
Enter a value.
config_token>
没有授权链接了,会提示没有浏览器。
所以只能本地 windows 上弄好了,再把配置文件rclone.conf传到 服务器 上了。
2-2. 创建rclone.conf配置文件
我们先来到Windows上面来创建rclone.conf配置文件。
google drive盘有区分个人盘和团队盘
演示个人盘配置,团队盘也大同小异。
2-2-1. rclone下载
官网下载:https://rclone.org/downloads/
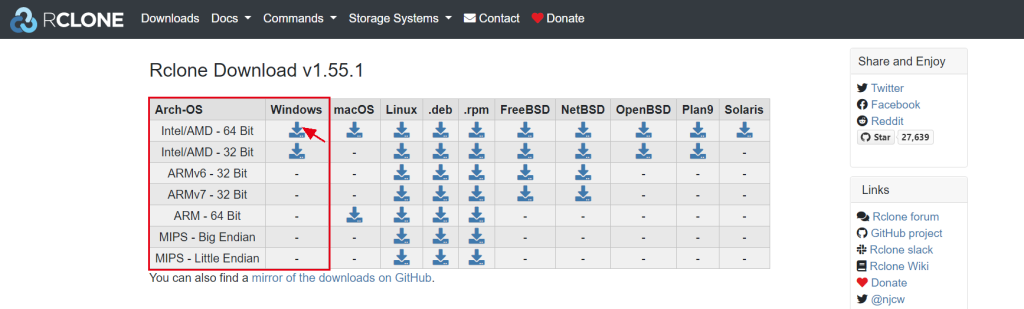
或者你可以在GitHub下载
Github下载:https://github.com/rclone/rclone/releases
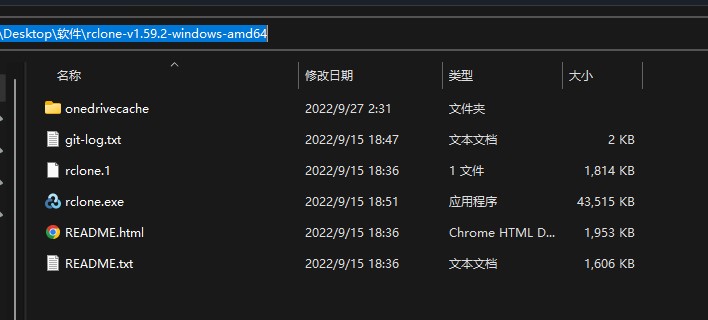
下载后解压
我这里直接解压到我的桌面
2-2-2. 为rclone配置环境变量
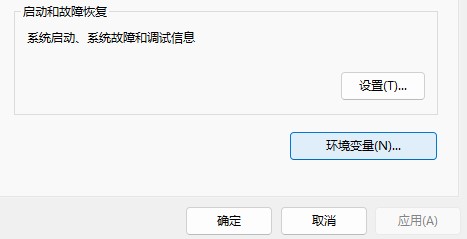
- 点开电脑的查找输入查看高级系统设置
- 选择环境变量
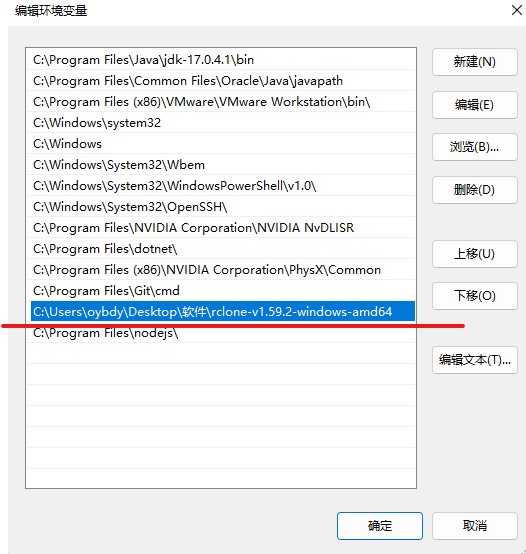
- 找到刚刚解压的Rclone的路径添加进Path变量
- 检查rclone是否配置成功,然后按打开,当然也可以打开,输入,如果出现下面的输出则安装成功,否则检查整个步骤的环境是否配置正确。
rclone --version


2-2-3. 正式配置
来到命令提示符
C:\Users\Administrator>rclone config
No remotes found - make a new one
n) New remote
s) Set configuration password
q) Quit config
n/s/q> n *//第一步:新建配置*
name> tutugd
Type of storage to configure.
Enter a string value. Press Enter for the default ("").
Choose a number from below, or type in your own value
 1 / 1Fichier
   \ "fichier"
 2 / Alias for an existing remote
   \ "alias"
 3 / Amazon Drive
   \ "amazon cloud drive"
 4 / Amazon S3 Compliant Storage Providers including AWS, Alibaba, Ceph, Digital Ocean, Dreamhost, IBM COS, Minio, and Tencent COS
   \ "s3"
 5 / Backblaze B2
   \ "b2"
 6 / Box
   \ "box"
 7 / Cache a remote
   \ "cache"
 8 / Citrix Sharefile
   \ "sharefile"
 9 / Compress a remote
   \ "compress"
10 / Dropbox
   \ "dropbox"
11 / Encrypt/Decrypt a remote
   \ "crypt"
12 / Enterprise File Fabric
   \ "filefabric"
13 / FTP Connection
   \ "ftp"
14 / Google Cloud Storage (this is not Google Drive)
   \ "google cloud storage"
15 / Google Drive
   \ "drive"
16 / Google Photos
   \ "google photos"
17 / Hadoop distributed file system
   \ "hdfs"
18 / Hubic
   \ "hubic"
19 / In memory object storage system.
   \ "memory"
20 / Jottacloud
   \ "jottacloud"
21 / Koofr
   \ "koofr"
22 / Local Disk
   \ "local"
23 / Mail.ru Cloud
   \ "mailru"
24 / Mega
   \ "mega"
25 / Microsoft Azure Blob Storage
   \ "azureblob"
26 / Microsoft OneDrive
   \ "onedrive"
27 / OpenDrive
   \ "opendrive"
28 / OpenStack Swift (Rackspace Cloud Files, Memset Memstore, OVH)
   \ "swift"
29 / Pcloud
   \ "pcloud"
30 / Put.io
   \ "putio"
31 / QingCloud Object Storage
   \ "qingstor"
32 / SSH/SFTP Connection
   \ "sftp"
33 / Sugarsync
   \ "sugarsync"
34 / Tardigrade Decentralized Cloud Storage
   \ "tardigrade"
35 / Transparently chunk/split large files
   \ "chunker"
36 / Union merges the contents of several upstream fs
   \ "union"
37 / Webdav
   \ "webdav"
38 / Yandex Disk
   \ "yandex"
39 / Zoho
   \ "zoho"
40 / http Connection
   \ "http"
41 / premiumize.me
   \ "premiumizeme"
42 / seafile
   \ "seafile"
Storage> 15 *//找到 Google Drive 这里可以看到是 18 号 第二步:选择15 Google Drive*
Option client_id.
Google Application Client Id
Setting your own is recommended.
See https://rclone.org/drive/#making-your-own-client-id for how to create your own.
If you leave this blank, it will use an internal key which is low performance.
Enter a value. Press Enter to leave empty.
client_id>
# 留空就行
Option client_secret.
OAuth Client Secret.
Leave blank normally.
Enter a value. Press Enter to leave empty.
client_secret>
# 留空就行当然这里你也可以自己配置 GoogleDriveAPI。
Google API 控制台地址
https://console.developers.google.com/
我们还是直接留空默认得了。
Option scope.
Scope that rclone should use when requesting access from drive.
Choose a number from below, or type in your own value.
Press Enter to leave empty.
 1 / Full access all files, excluding Application Data Folder.
   \ (drive)
 2 / Read-only access to file metadata and file contents.
   \ (drive.readonly)
   / Access to files created by rclone only.
 3 | These are visible in the drive website.
   | File authorization is revoked when the user deauthorizes the app.
   \ (drive.file)
   / Allows read and write access to the Application Data folder.
 4 | This is not visible in the drive website.
   \ (drive.appfolder)
   / Allows read-only access to file metadata but
 5 | does not allow any access to read or download file content.
   \ (drive.metadata.readonly)
scope> 1

# 输入 1 完全读写权限
回车
Option service_account_file.
Service Account Credentials JSON file path.
Leave blank normally.
Needed only if you want use SA instead of interactive login.
Leading ~ will be expanded in the file name as will environment variables such as ${RCLONE_CONFIG_DIR}.
Enter a value. Press Enter to leave empty.
service_account_file>

# 留空就行

Edit advanced config?
y) Yes
n) No (default)
y/n>

# 输入 n
回车
Use auto config?
 * Say Y if not sure
 * Say N if you are working on a remote or headless machine

y) Yes (default)
n) No
y/n>

# 输入 n
# 提示:

Option config_token.
For this to work, you will need rclone available on a machine that has
a web browser available.
For more help and alternate methods see: https://rclone.org/remote_setup/
Execute the following on the machine with the web browser (same rclone
version recommended):
        rclone authorize "drive" "eyJzY29wZSI6ImRyaXZlIn0"
Then paste the result.
Enter a value.
config_token> 等待输入

# 回到本地 windows 上
这里我们回到windows上用管理员权限再打开一个命令提示符
cd 我们解压rclone的目录
rclone authorize "drive"会自动打开浏览器让你登录你的google账户
这里我们在浏览器授权里进行一下授权操作。
点击允许后,浏览器出现Success!提示证明成功了。
出现大一串字符。
复制 access_token 注意:连同大括号一同复制,从大括号开始到大括号结束。
然后把复制的 code 粘贴到 SSH 终端上回车。
Configure this as a Shared Drive (Team Drive)?

y) Yes
n) No (default)
y/n>

#输入 n 默认回车就是 n 了

Configuration complete.
Options:
- type: drive
- scope: drive
- token: {"access_token":"ya2PJrRmKORRz9dTlkq-on8XQQE65dr8CQEx-3PjmyPoFw6VxZxYYw0163","token_type":"Bearer","refresh_token":"1//0e7xWWDX2tRgPCgYIARAAGA4SNwF-L9Irvw-ZnCue7vgz6kb6jYstKGyZsBliCvNGbj9tWd1mZGEoegiCYxoPIU0z9j6nmFck41c","expiry":"2022-09-08T22:42:59.5596286+08:00"}
- team_drive:
Keep this "1" remote?
y) Yes this is OK (default)
e) Edit this remote
d) Delete this remote
y/e/d>

# 输入 y 完成。
团队盘/共享盘
跟个人盘差不多,只不过进行到最后有一些差异
2022/09/13 14:38:20 NOTICE: If your browser doesn't open automatically go to the following link: http://127.0.0.1:53682/auth?state=XK4Khs8g
2022/09/13 14:38:20 NOTICE: Log in and authorize rclone for access
2022/09/13 14:38:20 NOTICE: Waiting for code...
2022/09/13 14:38:25 NOTICE: Got code
Configure this as a Shared Drive (Team Drive)?

y) Yes
n) No (default)
y/n> y

# 这里会提示,Configure this as a Shared Drive (Team Drive)? 将此配置为共享驱动器(团队驱动器)?默认回车是 N ,如果是团队盘/共享盘的话,要选 y 。

Option config_team_drive.
Shared Drive
Choose a number from below, or type in your own string value.
Press Enter for the default (0AGt8URxxxxPVA).
 1 / Patricia
   \ (0AGtXXXXX9PVA)
config_team_drive>

# 然后就会检测你的账户下有几个团队盘/共享盘,这串代码的意识就是:https://drive.google.com/drive/u/2/folders/0AGtXXXXX9PVA
# 点开你的团队盘/共享盘,网址栏最后那一串代码。
# 然后一路回车就行了。
2-2-4. 服务器下载安装rclone
apt-get update
curl https://rclone.org/install.sh | sudo bash
2-2-5. 配置到服务器
我们在windows的C:\Users\xxx\AppData\Roaming\rclone下找到创建好的rclone.conf
然后上传到我们的服务器的/root/.config/rclone目录下
然后就大功告成了。
3.测试上传命令
上传之前别忘装一个 screen
一般情况上传的时候,我们把终端一关闭,程序运行就停止了,但有时候上传的文件比较多,总不能一直开着终端,所以 screen 的做用就是让你关闭终端后依旧保持上传。
apt-get install -y screen测试一下上传。我把服务器本地的/root/download/目录里面的文件复制到谷歌云的upload目录里。
开启4线程,并显示上传详情
命令就是:
screen rclone copy /root/download/ gd-ceshi:/upload --transfers 4 -P

# 你说你不想复制?想上传完就删除本地的文件?
## 那就把 copy 这个参数 改成 move
rclone move /root/googledrive/ tutugd:/dianyin --transfers 4 -P
# 你说你的服务器cpu性能强劲?网速也快?4线程太慢了,想要12线程?
## 那就把--transfers 4 这个 4 改成 12

# 你说你想反过来?把云盘的文件下载到服务器本地?
## 那就倒过来:screen rclone copy gd-ceshi:/upload /root/download/ --transfers 4 -P
rclone 缓存目录位于 $HOME/.cache/rclone,如果服务器挂载了额外磁盘,建议将这个目录做软连接到非系统盘,避免 rclone 使用中占用过多系统磁盘空间。
挂载
下面直接用实际实用的挂载命令来做说明:
#一条完整的Rclone挂载命令
rclone mount od:/file /data/wwwroot/xxx --allow-other --attr-timeout 5m --vfs-cache-mode full --vfs-cache-max-age 24h --vfs-cache-max-size 10G --vfs-read-chunk-size-limit 100M --buffer-size 100M --daemon
命令拆分:
- rclone mount:rclone 挂载命令
- od:/file:od 为配置好的 OneDrive,od:/file 是 OneDrive 路径
- /data/wwwroot/xxx:为 PS 本地文件夹路径(建议为空目录)
- –allow-other:允许非当前 rclone 用户外其它用户进行访问
- –attr-timeout 5m:文件属性缓存,(大小,修改时间等)的时间。如果 VPS 配置比较低,建议适当提高这个值,避免过多内核交互,降低资源占用。
- -vfs-cache-mode full:开启 VFS 文件缓存,可减少 rclone 与 API 交互,同时可提高文件读写效率
- –vfs-cache-max-age 24h:VFS 文件缓存时间,这里设置 24 小时,如果文件很少更改,建议设置更长时间
- –vfs-cache-max-size 10G:VFS文件缓存上限大小,建议不超过当前空余磁盘的50%
- vfs-read-chunk-size-limit 100M:分块读取大小,这里设置的是100M,可提高文件读的效率,比如1G的文件,大致分为10个块进行读取,但与此同时API请求次数也会增多
- –buffer-size 100M:内存缓存,如果您内存比较小,可降低此值,如果内存比较大,可适当提高
- –daemon:指后台方式运行
可根据 VPS 实际配置来适当调整,以免 rclone 占用过多 CPU或者内存。更多参数说明,可参考 rclone 官方文档。
rclone 取消挂载
通常情况,直接使用 umount 命令取消挂载即可:
#/path/to/local/mount为挂载目录
umount /path/to/local/mount

#或者使用fusermount
fusermount -u /path/to/local/mount
如果提示磁盘繁忙,只能暴力 kill 杀掉进程,命令为:
#kill杀掉进程
pgrep 'rclone'|xargs kill -9

#再次取消挂载
umount /path/to/local/mount
Pingback:qbittorrent+Rclone+Google Drive网盘=无限离线下载空间 – Tutu的个人博客
Pingback:Windows,Linux安装rclone,并配置挂载微软免费SharePoint 25T空间到本地(白嫖25T网盘指南) – Tutu的个人博客